Mod_rewrite may be a powerful Apache module that gives universal resource locator manipulation capability. the subtle feature permits webmasters to rewrite URLs and this can be a standard follow in several content management systems.
Mod_rewrite is legendary for translating human-readable URLs in dynamic websites. This makes the URL’s look cleaner and friendly in websites.
Step 1: Enable mod_rewrite
Use a2enmod command as given below.
sudo a2enmod rewrite
If mod_rewrite is already enabled you will get the message from command line. After enabling ,mod_rewrite, just restart the apache server using the following command.
sudo systemctl restart apache2
Thus, your server the ready to accept the rewrite rule and you will be able to configure your web server using .htaccess file.
Step 2: Configure server to accept .htaccess files
Now go to your virtual host configuration file which is by default available in the directory (/etc/apache2/sites-available). for example the default file is 000-default.conf . For more about creating virtual host please visit here . For default use the below command .
sudo nano /etc/apache2/sites-available/000-default.conf
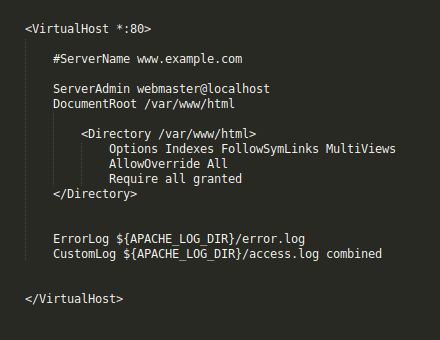
Now you will see the code as given below inside the opening and closing tags of <VirtualHost></VirtualHost> .
#ServerName www.example.com
	ServerAdmin webmaster@localhost
	DocumentRoot /var/www/html

	ErrorLog ${APACHE_LOG_DIR}/error.log
	CustomLog ${APACHE_LOG_DIR}/access.log combined
Now add the following line to the block inside <VirtualHost></VirtualHost> .
<Directory /var/www/html>
Options Indexes FollowSymLinks MultiViews
AllowOverride All
Require all granted
</Directory>
Now your Config file appears some this like ..

Now you can modify your htaccess file according to your requirements…